
Hi there!
I'm Rachael Franco from Sew Below the Willow Tree, and I'm so excited to share my newest project with you today! I usually share my sewing efforts on my blog {http://sewbelowthewillowtree.com/ } and Instagram. {https://www.instagram.com/sewbelowthewillowtree/ }
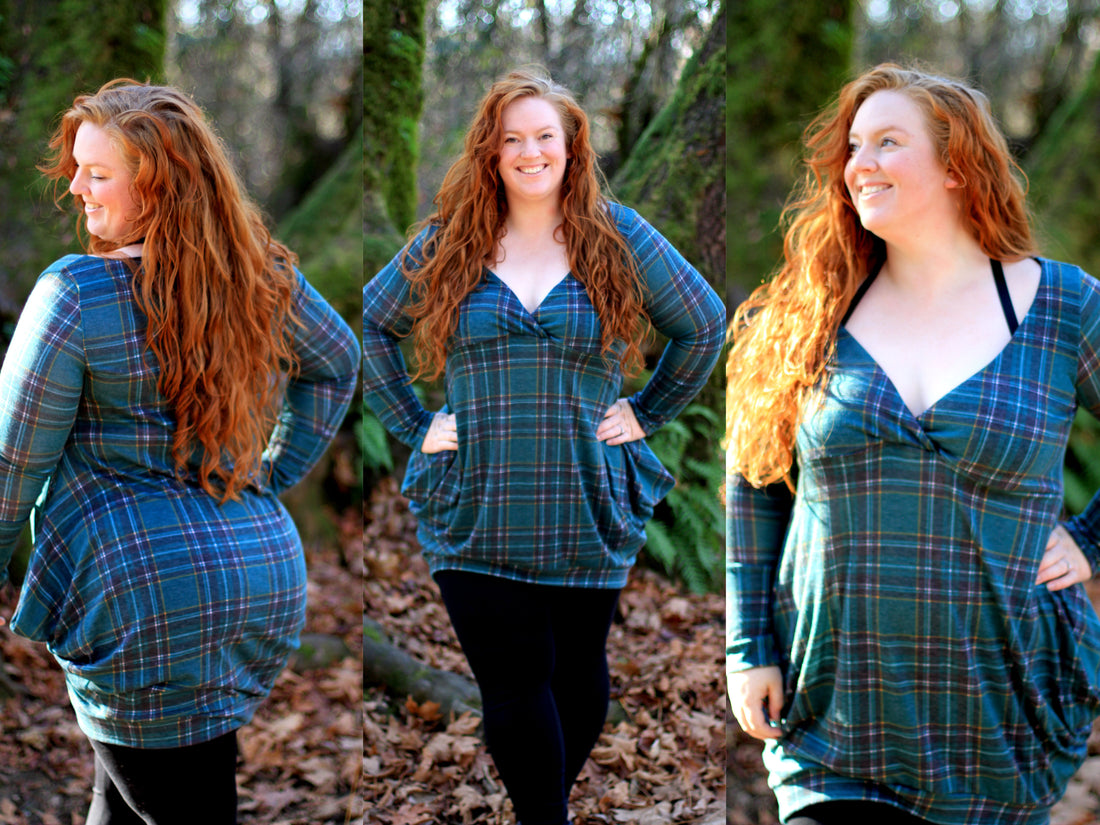
When the December dress came out last winter I was super interested in the pattern. But I had reservations about how it would look on my rather ample hips. I'm OK rocking things that accentuate my hips, but certain shapes don't work for me, so uncertainty made me wait. My mind was pretty easily swayed when I saw this gorgeous dress though. 
At a glance, this struck me as a pretty straightforward mash-up of the December Dress {https://georgeandgingerpatterns.com/collections/dresses/products/the-december-dress-womens-sizes-pdf-sewing-pattern } and the Lounge Gown. {https://georgeandgingerpatterns.com/collections/freebies/products/free-lounge-gown-pdf-sewing-pattern } I knew I wanted a little more coverage over the bust than the Lounge Gown provides, so that took a little adjustment. Otherwise, the combination was pretty basic.
Let's get into it!
To start, I used the following tools. Some are subjective and personal preference-
-Lounge Gown Front Bodice piece
-Full December pattern- length and sleeve options to your preference
-Paper for tracing (pattern tracing paper, freezer paper, parchment paper, etc.)
-Cutting tools (a mat and rotary cutter are mandatory for me, but do you)
-Soft measuring tape
-Sewing Machine
-Serger, if available
-Fabric, I followed the fabric recommendation on the December pattern and used a plaid hacci knit for my outer and a black light-weight ponte (very light for ponte) for my lining
-Thread
First thing is to get the pattern pieces sorted. I need to get a piece made for my cross-over front bodice and liner, the front skirt, and the back bodice facing.
The front bodice piece is the most crucial. I overlaid the Lounge Gown bodice piece over the December. The important details to maintain are the armscye and down the side seam, and the cross-over neckline. 
I measured the distance from the point the armscye would land to my underbust, and got 5”. I took that number and marked it down on the side seam of the December front bodice. That was the point I wanted the new front bodice piece to end. I also wanted to bring the line of cross-over out for more coverage. I free-handed a wider line and increased the width of the piece and the length of the cross-over. If I wanted more than my final result here, I think I would need to widen the shoulder seams on the front and back bodice. 
For the front skirt piece, I kept basically the same line I used on the upper front bodice. I dropped the curve of the line slightly at the fold to make the middle point less dramatic and more flat. Enjoy this poorly sketched illustration of my explanation since I didn't get a good picture. 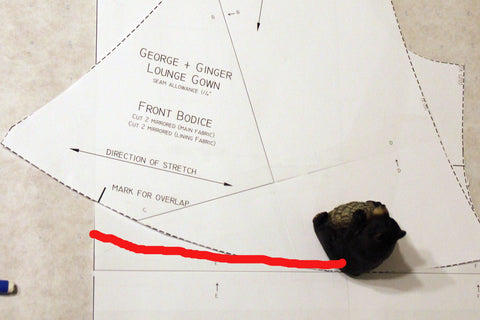
I was sure to add the 1/4” seam allowance to both the new bodice and skirt pieces, since I basically cut the piece in half-ish. This is also the point I made sure all necessary pattern marking were transferred, chiefly the overlap marking and the pocket placement. 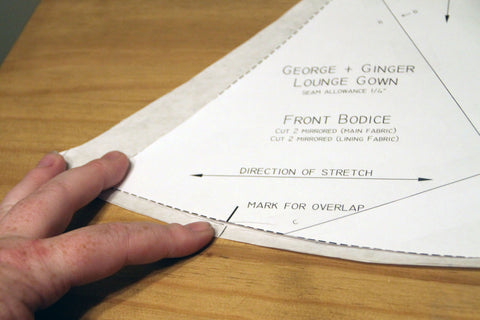
The back bodice facing is a pretty straightforward piece. Because I lined the front bodice, the back neckline needs to be finished somehow. Lining or facing make the most sense. I didn't want to line it. So... facing!

I traced the neckline, shoulder seam, and upper armscye per the pattern. The facing only needs to be a few inches tall, so I picked an arbitrary height and drew a complimenting curve. And now exists a facing piece. 
After tracing and cutting, I have the following pieces cut:
-1 x back bodice, cut on fold (December pattern)
-1 x back bodice facing, cut on fold (traced piece)
-2 x front bodice outer, mirrored (mashed bodices, traced piece)
-2 x front bodice liner, mirrored (mashed bodices, traced piece)
-1 x front skirt, cut on fold (adjusted from upper bodice, December pattern)
-2 x sleeves, mirrored (December pattern)
-1 x hem band, cut on fold (December pattern)
-2 x long sleeve cuffs, cut on fold (December pattern)
-4 x pockets, mirrored (December pattern)
And now we're to construction!
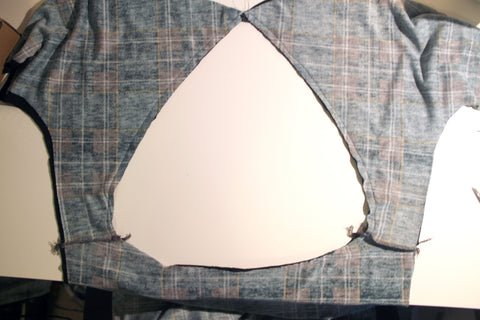
A lot of the construction is done following one of the patterns, but the first few steps are from neither. The liner/facing pieces and the front and back bodices need to be sewn together before anything else can be done. I attached the front liner pieces to the back facing at the shoulder seams with a serger.

I then did the same to the outer bodice fabrics, with right sides together.

Next, using a sewing machine, which is important so you can clip the curves of the neckline, I stitched the outer fabric to the lining fabric, right sides together, at the 1/4” seam allowance.
I then clipped the curves to help everything lay flat, per the Lounge Gown pattern. Optionally, the back facing can be understitched or topstitched at this point. I left it as-is.
Now, with the bodice outer and lining turned wrong sides together, I basted the overlap on the front bodice, using the marks I transferred from the Lounge Gown pattern piece. From this point on, I treated the front bodice outer and liner and one piece. However, I didn't baste to maintain stretch for the next steps. 
We're basically to the point of coasting and following the given instructions, namely the December pattern. So, just a few minor notes on finishing with the changes I made.
I attached the sleeves as I normally would with a standard bodice. I laid out the main bodice piece right side up, and eased the sleeve into the armscye curve, being sure to orient the sleeve correctly and position it at the shoulder seam where it's marked in the pattern. The only extra thing to be cognizant of was making sure the lining/facing was correctly lined up and matched to the bodice outer when serging the sleeve.
Next, I just took a little extra care to make sure everything was matching on the two-piece front with the single piece back. Since I chopped it up and changed curves and added seam allowance, I just held my breath and said a small prayer to any power who might listen and answer sewing prayers. And the pieces worked out.
At this point, I followed the December pattern instructions. I attached the pockets and sewed up the side seams. I chose to do the long sleeves, so I attached the long sleeve cuffs, and lastly, added the hem band.

I am so happy with this final dress. I would add more bust coverage if I made another, as I'm probably not wearing this to storytime soon. But I so love it and I feel sexy as hell. I hope this was helpful to anyone to might want to mash these two patterns!
Thanks so much for reading, and happy sewing!
25 comments
AGUTJrkWHP
JLmByRouSvi
pkHqKouYLT
qWSKeZyUNVHmQ
sNrGRXWTCzxyM